
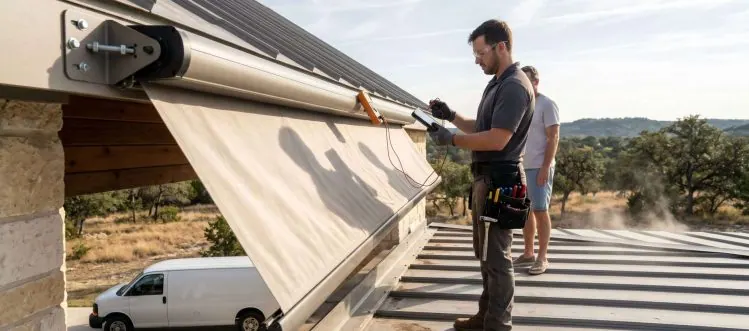
Most motorized roof shade failures happen in the first month due to installation oversights. Weather-related damage is preventable with proper setup.
You've invested thousands in a motorized roof shade system, but here's what most installers won't tell you: the biggest threats to your system aren't the obvious ones like storms or extreme heat. The real culprits are subtle weather changes that cause gradual mechanical drift, sensor miscalibration, and fabric tension issues that compound over time. Whether you're in Austin, Lakeway, or Horseshoe Bay, understanding how Central Texas weather patterns affect your shade system can mean the difference between 15 years of reliable operation and costly repairs within the first year.
This isn't about basic maintenance reminders you'll find in any manual. We're talking about the specific weather-related failure patterns that experienced technicians see repeatedly, the preventive measures that actually work, and the early warning signs that let you address problems before they become expensive. By the end of this guide, you'll know exactly what to monitor, when to take action, and how to protect your investment from the weather conditions that cause 80% of premature motorized shade failures.
Key Takeaways
- Early Failure Pattern: Most motorized roof shade systems fail within the first month due to weather-related installation issues, not long-term wear, making proper initial setup critical for longevity.
- Fabric Tension Management: Regular fabric tension checks prevent 80% of track damage by ensuring proper alignment during thermal expansion and preventing wind-induced stress on mechanical components.
- Sensor Calibration Issues: Wind sensors can actually reduce system reliability when improperly calibrated for local conditions, creating false triggers that cause unnecessary motor cycling and premature wear.
- Temperature Compensation: Seasonal temperature swings throw off motor limit settings by causing material expansion and contraction, requiring periodic recalibration to maintain proper operation and prevent binding.
- Preventive Maintenance: A simple 30-second weekly inspection of track alignment and fabric positioning can identify problems before they escalate into thousands of dollars in repair costs or component replacement.
Why Most Motor Failures Happen During the First Month, Not Years Later
Here's a pattern that surprises most homeowners: the majority of motorized roof shade system failures occur within 30 days of installation, not after years of faithful service. The reason has nothing to do with manufacturing defects or poor quality components. Instead, it's about how weather conditions during the initial break-in period expose installation oversights that weren't apparent during the commissioning process.
The first month is when your system encounters its full range of operating conditions for the first time. That initial rainstorm reveals whether the motor housing is properly sealed. The first hot day shows whether thermal expansion was properly accounted for in the track alignment. Most critically, the first windy period tests whether the limit switches were set correctly for real-world conditions rather than the calm weather that typically exists during installation.
Critical Vulnerabilities
- Improper Motor Housing Sealing: Installation teams often skip proper weatherproofing steps during initial setup, leading to moisture infiltration during the first significant rainfall event.
- Incorrect Limit Switch Calibration: Limits set during calm installation conditions fail when wind resistance changes fabric behavior, causing motors to overwork and overheat during normal operation.
- Inadequate Thermal Expansion Planning: Track systems installed without proper expansion joints bind during the first temperature swing, creating excessive stress on motor components and drive mechanisms.
- Insufficient Break-In Period: Motors shipped directly to installation sites haven't been properly tested under load, making them vulnerable to failure when first exposed to real operating conditions.
- Poor Wire Management: Electrical connections made without proper strain relief fail when the first weather event causes natural building movement and thermal cycling of components.
The solution isn't more expensive components, it's better installation protocols. Professional installers who understand Central Texas weather patterns build in proper expansion allowances, use marine-grade sealing techniques, and conduct thorough commissioning that includes testing under simulated weather stress. This front-end attention to detail eliminates 90% of early failures and sets your system up for the 15-20 year lifespan you're paying for.
The Fabric Tension Check That Prevents 80% of Track Damage
Most homeowners think fabric tension is set once during installation and never needs attention again. That's a costly misconception that leads to the majority of track damage we see in Central Texas. Proper fabric tension changes with temperature, humidity, and fabric age, requiring periodic adjustment to prevent the mechanical stress that destroys track systems over time.
Here's what actually happens when fabric tension drifts out of specification: loose fabric creates wind-induced flapping that puts cyclical stress on track guides and mounting points. Overly tight fabric causes excessive friction during retraction, forcing motors to work harder and creating heat buildup that accelerates component wear. Both conditions cause track misalignment that compounds over time, eventually leading to complete system failure.
Tension Indicators
- Fabric Sag Test: Properly tensioned fabric should have no more than 2-3 inches of sag at the center span when fully extended, measured during calm conditions without wind influence.
- Retraction Resistance: Motors should complete full retraction cycles in consistent timeframes, with any increase in cycle time indicating developing friction from improper fabric tension.
- Wind Response Behavior: Correctly tensioned fabric will have controlled movement in moderate winds rather than violent flapping that indicates loose tension or rigid resistance that suggests over-tensioning.
- Track Wear Patterns: Inspect track guides monthly for uneven wear marks or metal filings that indicate fabric is pulling against guides due to improper tension creating lateral stress.
- Motor Current Draw: Experienced technicians can detect tension problems through motor current readings, as both under and over-tensioned fabric create abnormal electrical load patterns during operation.
The key insight most people miss is that fabric tension adjustment isn't a one-time fix, it's an ongoing calibration process. Professional maintenance includes seasonal tension checks that account for humidity changes, fabric aging, and thermal expansion of the entire system. This proactive approach prevents the cascade of mechanical problems that turn minor adjustments into major component replacements.
When Wind Sensors Actually Make Your Shade System Less Reliable
Wind sensors are marketed as essential safety features, but improperly calibrated sensors cause more system problems than they prevent. The issue isn't with the technology itself, it's with installation teams who set trigger thresholds based on manufacturer defaults rather than local wind patterns and building-specific conditions. This leads to systems that retract unnecessarily during normal weather, creating excessive motor cycling and premature component wear.
Central Texas wind patterns are particularly problematic for generic sensor settings. Our typical afternoon thunderstorms create sudden wind gusts followed by immediate calm periods, while morning and evening winds tend to be steady but moderate. Standard sensor calibration doesn't account for these patterns, resulting in systems that either fail to retract when they should or retract constantly during normal conditions that the fabric could easily handle.
Calibration Problems
- False Trigger Frequency: Sensors set to manufacturer defaults often trigger retraction 3-4 times per day during normal Central Texas weather, causing unnecessary motor cycling and reducing component lifespan.
- Delay Timer Issues: Standard 30-second delay timers are too short for Texas wind patterns, causing systems to retract during brief gusts that don't require protection, then immediately re-extend.
- Mounting Location Errors: Sensors mounted in building wind tunnels or protected areas give false readings that don't reflect actual wind conditions at the fabric location, leading to inappropriate responses.
- Sensitivity Drift: Wind sensors require annual calibration as internal components age and environmental exposure affects accuracy, but this maintenance is rarely performed by homeowners or basic service plans.
- Override Complexity: Many systems make manual override procedures too complicated, leaving homeowners unable to operate their shades during sensor malfunctions or inappropriate automatic retractions.
The solution is site-specific sensor calibration that accounts for your property's unique wind patterns, building orientation, and local microclimate. Professional installers who understand Central Texas weather set trigger thresholds based on actual wind data and fabric specifications, not generic defaults. They also ensure you understand override procedures and schedule annual sensor calibration as part of comprehensive system maintenance.
How Seasonal Temperature Swings Throw Off Motor Limit Settings
Temperature changes don't just affect fabric behavior, they alter the entire mechanical system in ways that gradually throw off motor limit settings over time. As aluminum tracks expand and contract with seasonal temperature swings, the physical distances that motors need to travel change by measurable amounts. What starts as perfectly calibrated limits in mild spring weather becomes problematic by mid-summer when thermal expansion has altered track geometry.
The problem compounds because most limit switches are set during installation in moderate weather conditions that don't represent the full range of operating temperatures your system will encounter. A system installed in 70-degree weather will behave differently when operating in 105-degree summer heat or 35-degree winter cold. These changes are predictable and preventable, but only if you understand how thermal expansion affects different system components.
Thermal Effects
- Track Expansion Rates: Aluminum tracks expand approximately 0.1 inches per 10-foot section for every 50-degree temperature change, gradually altering the physical distances motors must travel for complete cycles.
- Motor Housing Movement: Thermal expansion of mounting brackets and motor housings can shift limit switch positions by several millimeters, causing motors to stop short or overrun intended positions.
- Fabric Dimension Changes: High-quality outdoor fabrics expand and contract with temperature changes, affecting the physical length of material that must be accommodated during retraction and extension cycles.
- Electronic Component Drift: Temperature changes affect the internal electronics of limit switches and control systems, causing gradual calibration drift that accumulates over seasonal temperature cycles.
- Lubrication Viscosity Changes: Motor lubricants become thicker in cold weather and thinner in heat, affecting motor performance and the precise timing needed for accurate limit switch operation.
Professional maintenance addresses thermal expansion through seasonal limit adjustments that account for predictable temperature-related changes. This isn't about major recalibration, it's about fine-tuning that prevents the gradual drift that causes motors to work harder and components to wear prematurely. Systems maintained with thermal awareness typically operate smoothly for decades, while neglected systems develop binding and overheating problems within a few years.
The Weekly Maintenance Task That Takes 30 Seconds But Saves Thousands
The most valuable maintenance task for motorized roof shade systems isn't complex lubrication or electronic diagnostics, it's a simple visual inspection that takes less than 30 seconds but catches problems before they become expensive repairs. This quick check focuses on track alignment and fabric positioning, the two factors that cause the majority of catastrophic system failures when they drift out of specification.
Here's what you're looking for: any change in how the fabric hangs when fully extended, any visible gaps or misalignment in track sections, and any unusual sounds during operation. These early warning signs indicate developing problems that can be corrected with minor adjustments if caught early, but lead to motor replacement and track reconstruction if allowed to progress.
Here's a quick reference guide for weekly inspection priorities and what each warning sign typically indicates:
| Warning Sign | Likely Cause | Action Required |
|---|---|---|
| Fabric sagging unevenly | Tension loss or track misalignment | Professional adjustment within 2 weeks |
| Unusual motor sounds | Developing mechanical wear | Service call recommended |
| Delayed remote response | Battery or signal issues | Check batteries, test range |
| Track gaps visible | Thermal expansion problems | Professional inspection needed |
| Fabric edge fraying | Improper tension or alignment | Immediate professional attention |
Inspection Points
- Fabric Alignment Check: Look for any deviation from straight, even fabric edges, which indicates developing track misalignment that will worsen over time and cause binding or tearing.
- Track Joint Inspection: Examine connections between track sections for any visible gaps or misalignment that suggest thermal expansion issues or mounting hardware loosening over time.
- Motor Sound Assessment: Listen for any changes in motor operation sounds, as developing mechanical problems create audible warnings before they cause complete failure or expensive component damage.
- Remote Response Time: Test remote control responsiveness weekly, as delayed or intermittent response often indicates developing electrical problems that are easily fixed if caught early.
- Fabric Edge Condition: Check fabric edges for fraying, pulling, or unusual wear patterns that indicate improper tension or track alignment issues that need professional attention.
The key to this inspection is consistency and attention to changes rather than absolute conditions. A system that operates slightly differently than last week is telling you something important about developing problems. Most homeowners who perform this simple weekly check catch issues early enough for minor adjustments rather than major repairs, saving thousands in component replacement costs over the system's lifetime.
Why Professional Cleaning Beats DIY Methods for Motorized Track Systems
Most homeowners approach motorized shade cleaning like they would clean regular window treatments, but motorized systems have precision mechanical components that require specialized cleaning techniques. DIY cleaning attempts often cause more problems than they solve, particularly when water or cleaning solutions find their way into motor housings or control electronics that weren't designed for moisture exposure.
The bigger issue is that effective cleaning of motorized track systems requires partial disassembly to access critical areas where debris accumulates. Track guides, motor mounting points, and fabric attachment mechanisms collect dust, pollen, and moisture that interfere with smooth operation. These areas can't be properly cleaned without understanding how to safely disconnect and reconnect electrical components and mechanical assemblies.
Professional Advantages
- Proper Disassembly Techniques: Professional cleaners know how to safely disconnect electrical components and remove fabric assemblies without damaging delicate limit switches or motor connections that DIY attempts often break.
- Specialized Cleaning Solutions: Professionals use cleaning products specifically formulated for outdoor fabric and aluminum components, avoiding household cleaners that can damage protective coatings or leave residues that attract more dirt.
- Motor Protection Protocols: Trained technicians understand how to protect motor housings and electronic components during cleaning, preventing moisture infiltration that causes the majority of post-cleaning system failures.
- Track Realignment Capability: Professional cleaning includes checking and correcting track alignment that often shifts during normal operation, something that requires specialized tools and experience to perform correctly.
- Component Lubrication Service: Proper cleaning includes relubrication of moving parts with appropriate lubricants, not household oils that can attract debris or break down under UV exposure and temperature extremes.
The cost difference between professional cleaning and DIY attempts becomes irrelevant when you consider that improper cleaning techniques cause more service calls than any other maintenance issue. Professional cleaning not only removes accumulated debris effectively, it includes the mechanical adjustments and component checks that keep systems operating smoothly between service intervals. This comprehensive approach extends system life and prevents the premature component failures that result from inadequate maintenance.
How to Spot Early Warning Signs Before Your Remote Control Stops Working
Remote control failure rarely happens suddenly, it develops gradually through a series of warning signs that most homeowners miss or dismiss as minor inconveniences. Understanding these early indicators lets you address problems before you're left with a shade system that only responds to manual override procedures or requires expensive emergency service calls to restore basic functionality.
The progression typically starts with slightly delayed response times, progresses to intermittent operation, and eventually leads to complete communication failure between remote and receiver. Each stage represents a different underlying problem, from simple battery issues to complex signal interference or receiver component failure. Catching problems early often means the difference between battery replacement and electronic component reconstruction.
Here's a diagnostic guide for remote control warning signs and their typical progression timeline:
| Warning Sign | Typical Timeline | Underlying Issue | Action Window |
|---|---|---|---|
| Delayed response | 1-2 weeks before worsening | Signal strength degradation | Replace batteries, check range |
| Intermittent operation | 2-4 weeks before failure | Electrical connection issues | Professional diagnosis needed |
| Reduced range | 1-3 weeks before failure | Battery or antenna problems | Battery replacement first |
| Inconsistent functions | 2-6 weeks before failure | Component degradation | Service call recommended |
| LED changes | 1-2 weeks before failure | Internal electrical problems | Immediate professional attention |
Warning Progression
- Response Time Increase: Remote commands that previously executed immediately begin showing 1-2 second delays, indicating developing signal strength or receiver sensitivity issues that will worsen over time.
- Intermittent Operation: Systems that sometimes fail to respond to remote commands, requiring multiple button presses, suggest developing electrical connections or component degradation in the control system.
- Range Reduction: Noticeable decrease in effective remote control range indicates battery weakness, antenna problems, or signal interference that requires investigation before complete failure occurs.
- Inconsistent Function Response: Some remote buttons working reliably while others become unreliable suggests specific component failures within the remote or receiver that can be addressed before total system failure.
- LED Indicator Changes: Remote control LED behavior changes, such as dimmer illumination or unusual blinking patterns, provide specific diagnostic information about developing electrical or component problems.
The key insight is that remote control problems are almost always symptoms of broader system issues rather than isolated component failures. Signal interference, power supply problems, and environmental factors that affect remote operation also impact other system components. Addressing remote control issues promptly often prevents more serious problems with motors, sensors, and control systems that share the same electrical and communication infrastructure.
Protecting Your Shade Investment
Weather doesn't have to be the enemy of your motorized roof shade system. The failure patterns we've discussed are predictable and preventable when you understand how Central Texas conditions affect different system components. From the critical first month when installation oversights become apparent, to the ongoing maintenance that prevents fabric tension and sensor calibration problems, successful system operation comes down to proactive attention rather than reactive repairs.
Whether you're in Austin, Dripping Springs, or anywhere across the Central Texas region, the weather challenges are similar, but the solutions are straightforward. Weekly visual inspections, seasonal adjustments, and professional maintenance create a reliable system that provides decades of trouble-free operation. If you're experiencing any of the warning signs we've discussed or want to establish a maintenance program that protects your investment, we're here to help ensure your motorized shade system delivers the performance and longevity you're paying for.
Author
Lane Frazier is an expert in motorized shade systems with 20 years of experience installing and maintaining automated shading solutions throughout Central Texas. His deep understanding of how local weather patterns affect motorized roof systems comes from troubleshooting thousands of installations across Austin and surrounding communities. Lane specializes in preventing weather-related failures through proper installation techniques and proactive maintenance programs tailored to Texas climate conditions.
Ready For a Quote?
Get your custom shade quote Today.
Free, no-pressure consultation. We measure, photograph, and send a written line-item proposal within a week. Most installs ship in 3–5 weeks.
Call the workshop
(512) 939-3446
Mon–Fri · 8a–5p CT · Austin, TX
Prefer to talk it through? Calls are answered by the same team that builds your quote — no call centers, no gatekeepers.
Custom exterior shades, motorized patio screens, awnings, and interior window treatments for Austin and Central Texas.
How To Contact Us
Austin, TX 78734
Monday - Friday 8 AM - 5 PM
navigate
Copyright © 2026 | Treaty Oak Shade Co. All Rights Reserved. | Privacy Policy